- About Cloud Images
- Digital Ocean
- Microsoft Azure
- Google Cloud
- Amazon AWS
- Admin Dashboard
- Managing Users
- Managing Devices
- Usage Statistics
- Adding a License
- General Settings
- Server Settings
- Security Settings
- Network Settings
- Directory Settings
- Email Settings
Konnect™ Quickstart Guide
This section provides a high-level overview of a self-hosted deployment of KUY.io Konnect™ and the required initial configuration. The quickstart guide is intended to provide a general overview of the steps required to deploy Konnect™ access server, and each of these steps is described in more detail in the other sections of this documentation.
In this Quickstart guide, we assume that you will be deploying Konnect™ server to a Digital Ocean Virtual Machine provisioned with
Ubuntu 20.04 LTS. You can follow the same steps with any cloud provider - we picked DO in this example because they are super easy to get started with.
1. Create a Host
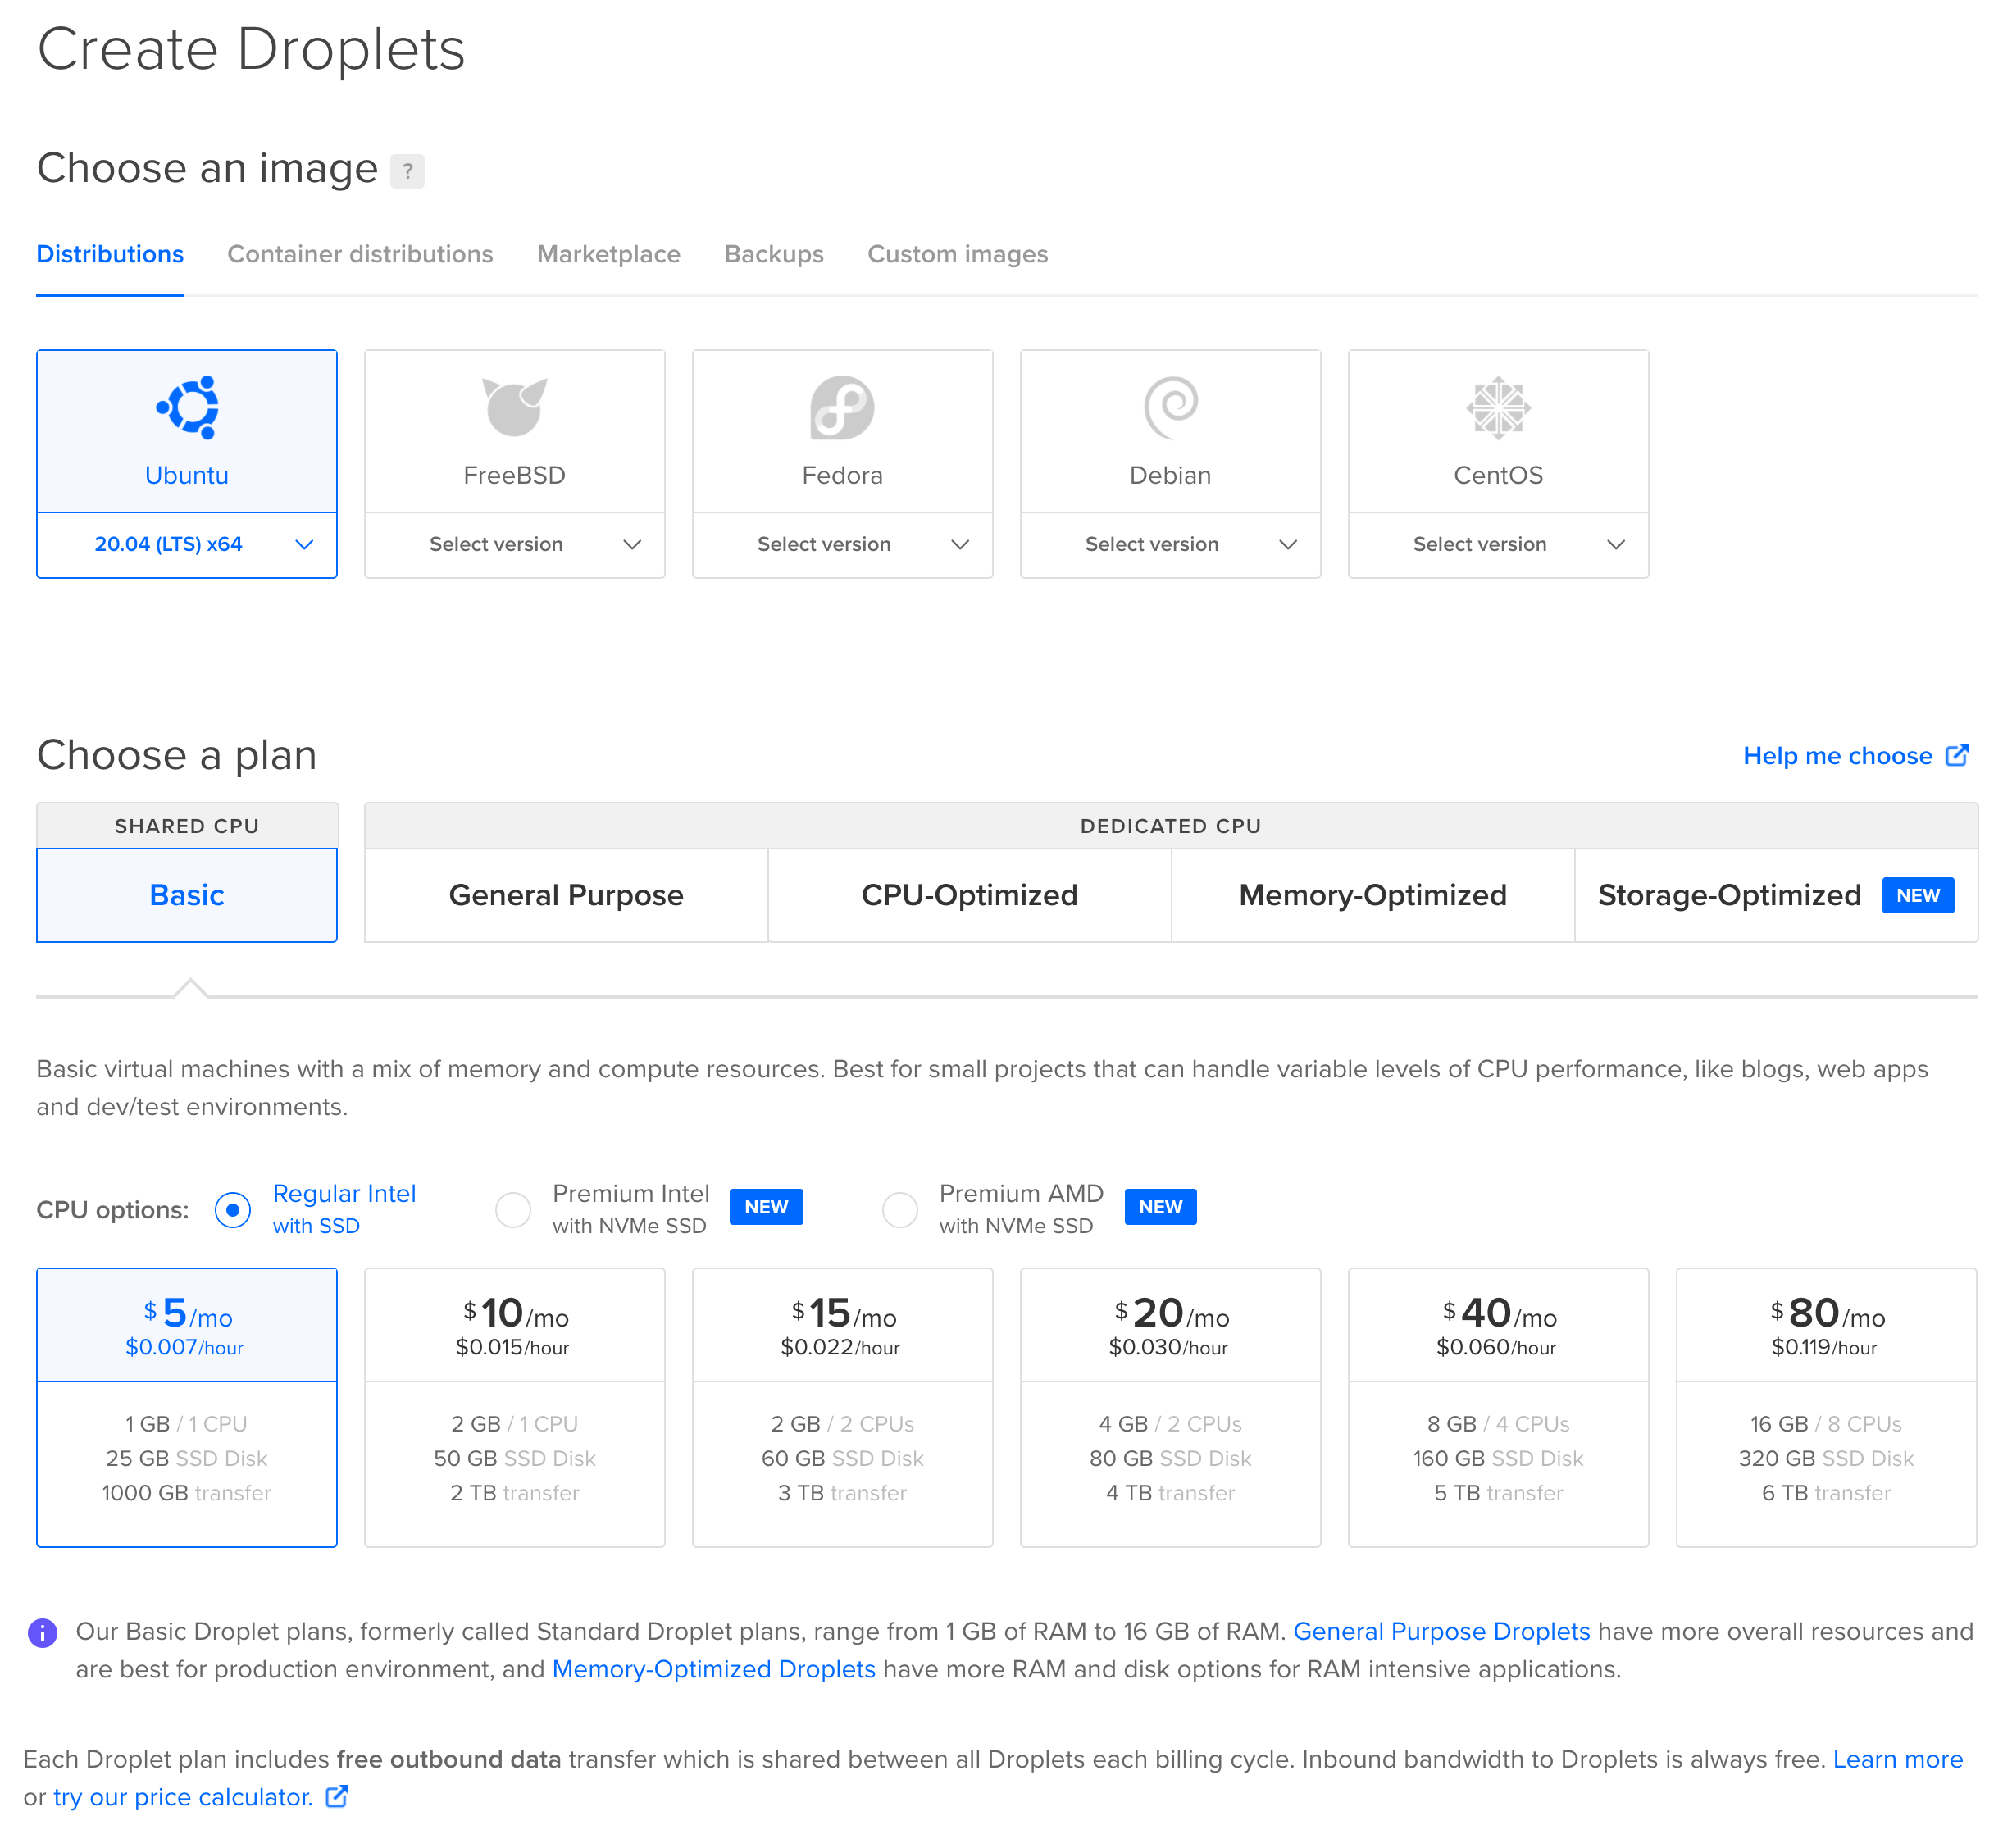
In your Digital Ocean console, create a new "Basic" Droplet, with 1 CPU, 1GB RAM as shown below.

Once the Droplet has finished provisioning, please log in to the Droplet instance with an ssh session.
2. Run the Deployment Script
Download our quickstart deployment script for Ubuntu 20.04 LTS from our public Github repository and execute it:
wget https://raw.githubusercontent.com/kuyio/konnect/main/konnect-quickstart-ubuntu.sh
bash konnect-quickstart-ubuntu.sh
The deployment script will prompt you for the following information:
- the installation directory for Konnect™ server, you can use the default
/opt/konnect - a full-qualified hostname for this instance, e.g.
vpn.example.com - an email address for the administrator of this deployment
Note: The hostname is required to automatically generate TLS/SSL certificates for the deployment with the Let's Encrypt service.
3. Launch Konnect™
You are now ready to launch your Konnect™ access server.
cd /opt/konnect
docker compose up
After successful initialization, your Konnect™ server will print a Setup Token to the terminal output. Please take a note of that token as you will require it in the next step.
4. Complete the Initial Configuration
When you navigate to your Konnect™ server's fully qualified domain name (for example: https://vpn.example.com) in your browser, you will be greeted by the initial configuration wizard. Paste the setup token from the previous step and click on "Validate" to continue.
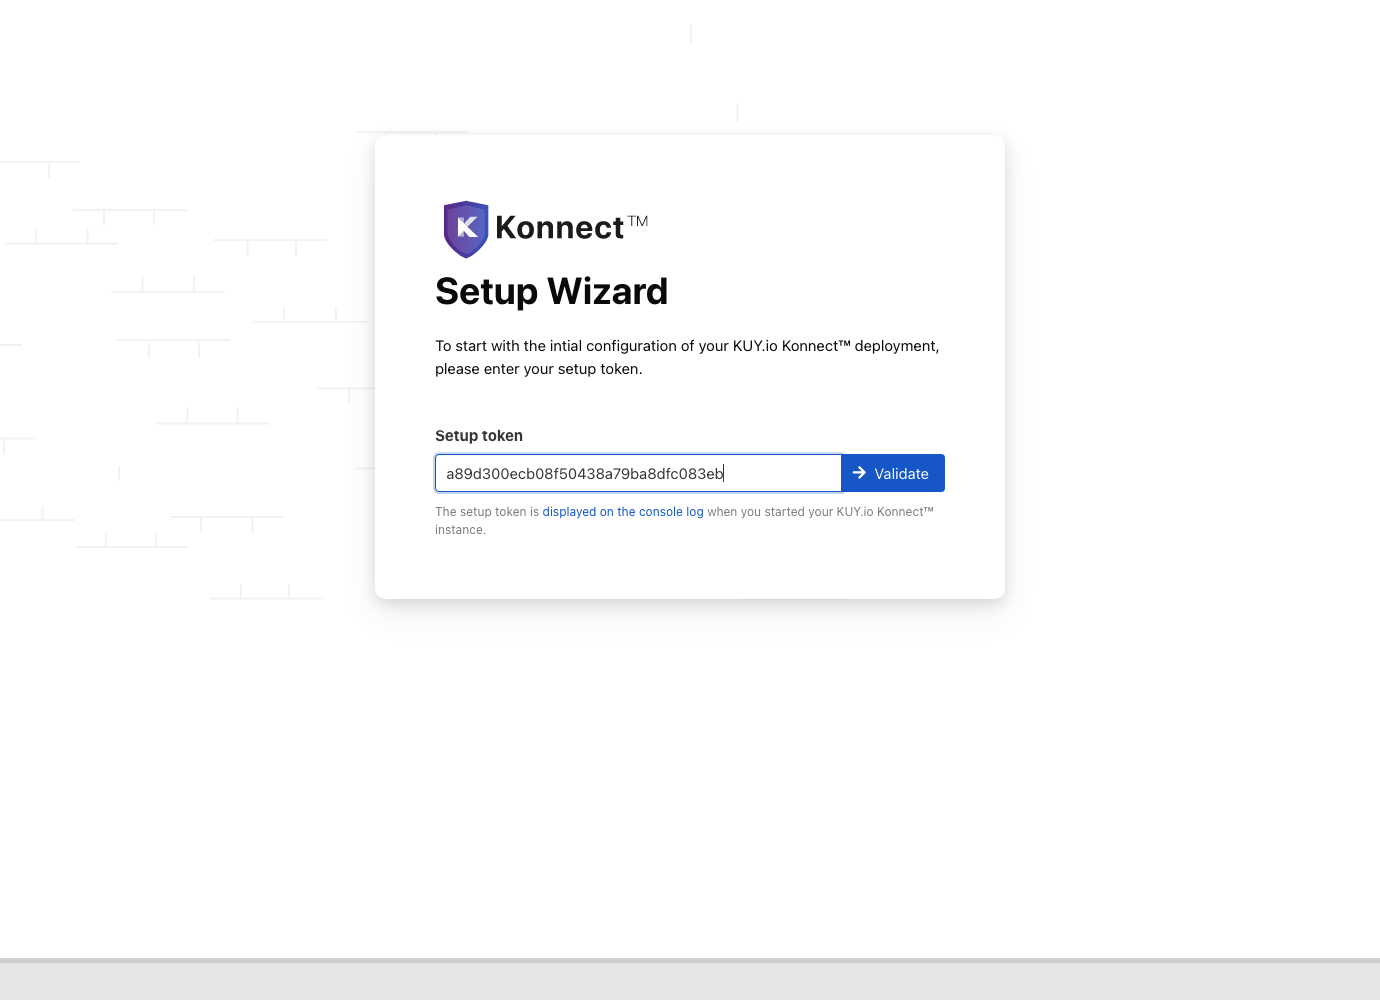
Note: The setup token safeguards your initial confguration - only the administrator deploying the instance with access to the terminal can read the setup token and complete this step. As long as the initial configuration hasn't been completed, a new token is generated every time you start your Konnect™ server application stack.
Please follow the steps in the initial configuration wizard to create an administator user, answer a few question about your environment and start the VPN service. For more details about this process please see our documentation on the first-time configuration.
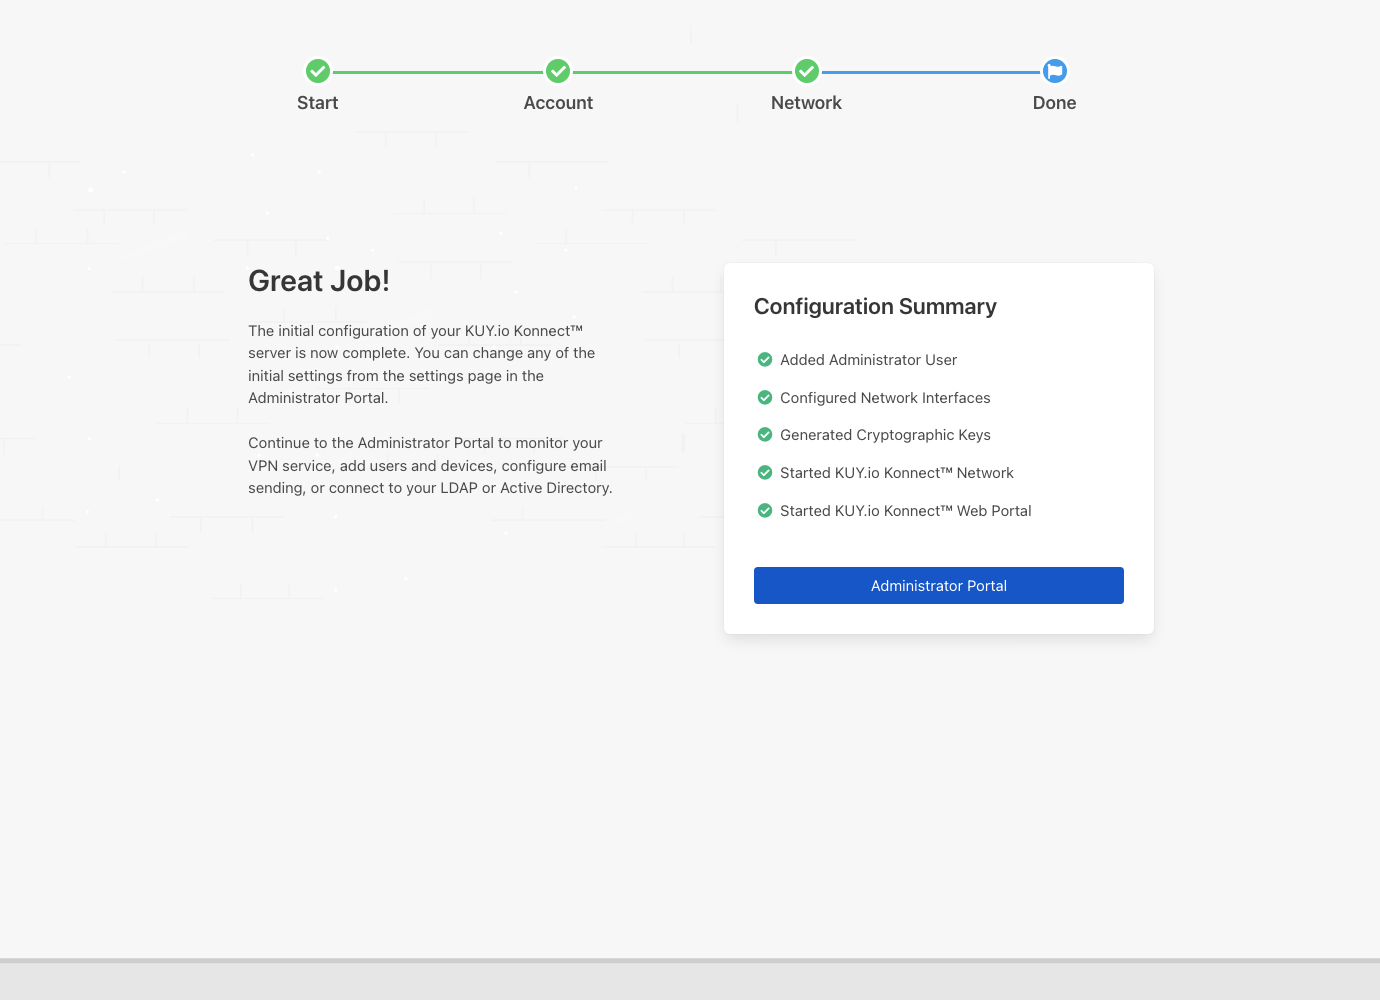
When you complete the initial setup, click on 'Administrator Portal' to access the admin portal and continue.
5. Add a Device
After the intial configuration is complete, you can log on to your Konnect™ instance with the administrator credentials you created in the previous step. For now, we have a single user configured in Konnect™ server - the administator user. We can test connectivity and the correct routing of data packets through the VPN tunnel by adding a test device to the administrator account.
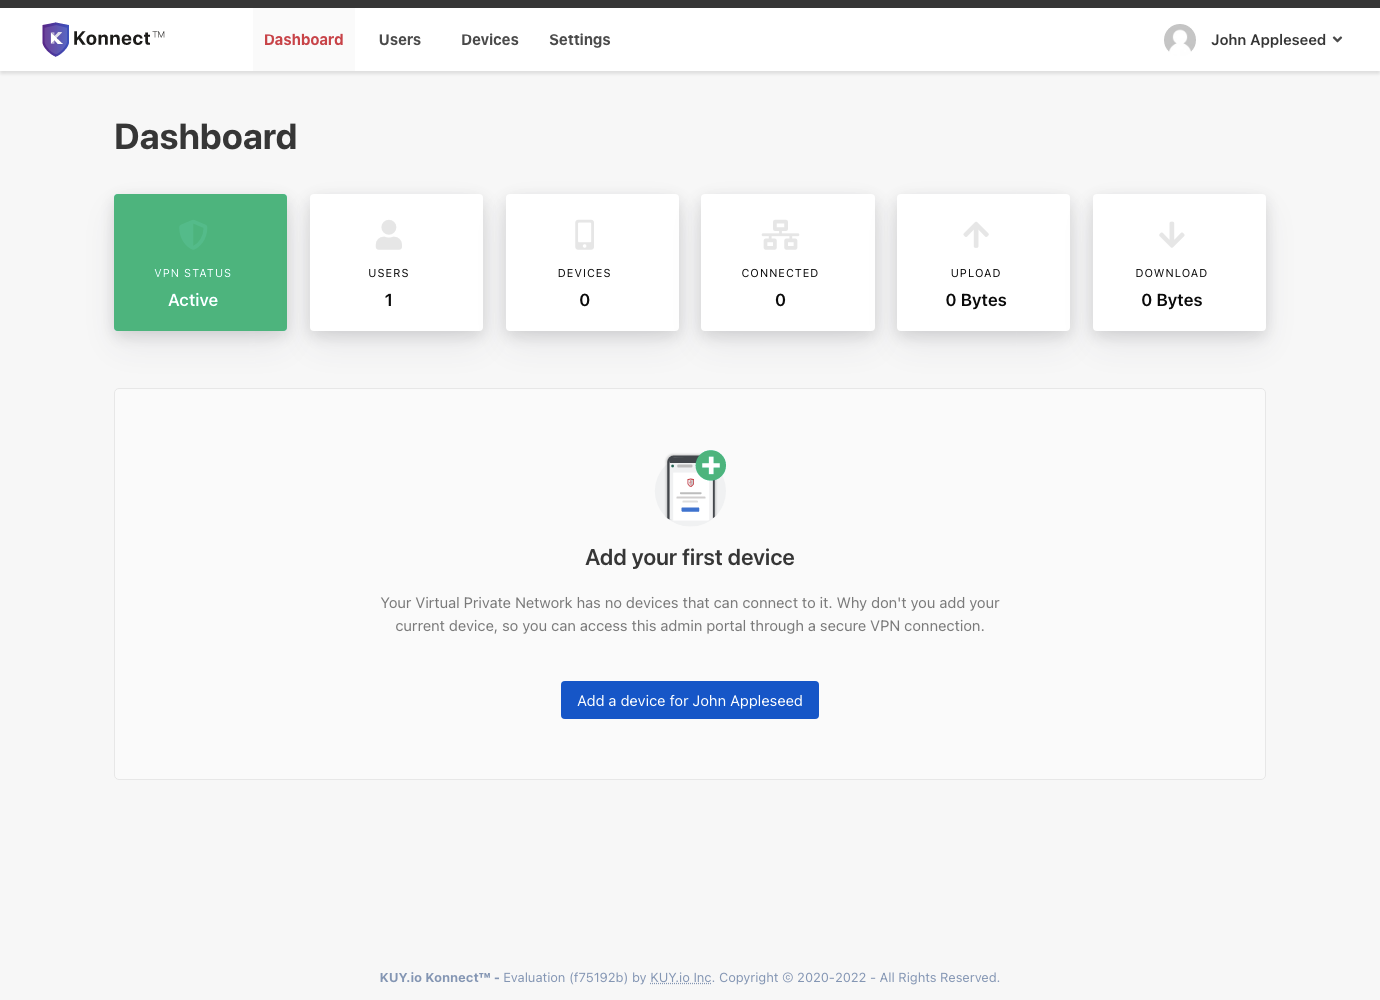
When you first login, you will see the main dashboard. Since we don't have any devices configured yet, the dashboard won't show any usage statistics.
When you select Users from the top navigation menu, you will see a list of your currently provisioned users. For now, there is only the administrator user you created during the intial configuration.
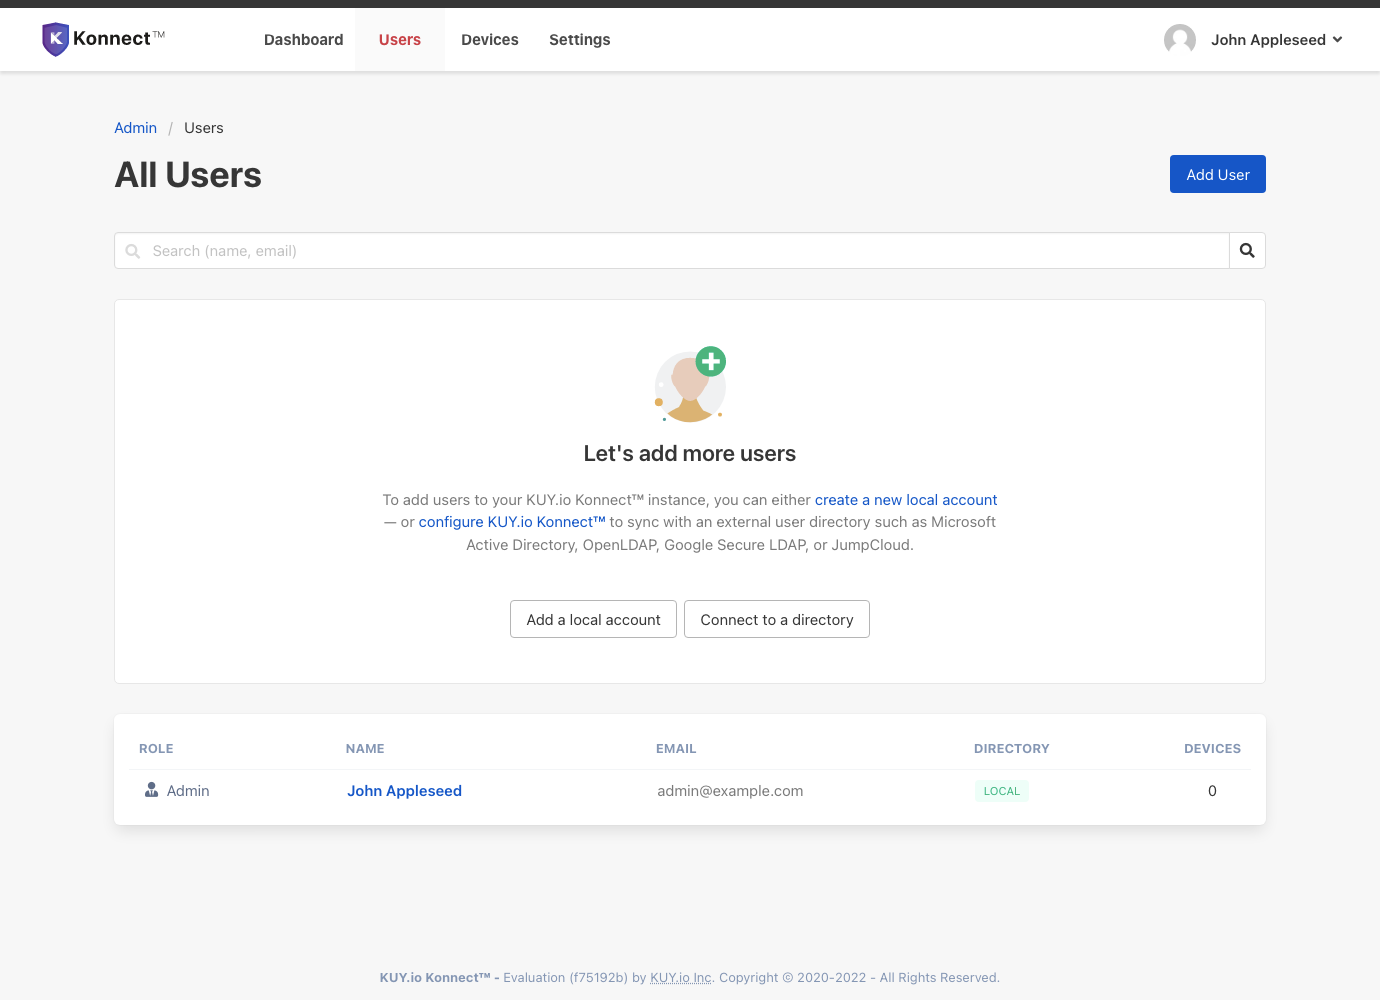
Go ahead and click on your administrator user's name or email address to bring up the details dialog. Select Add a new device to bring up the new device dialog. Here you can give the device a friendly name that you can use to quickly identify the device later on. Names like Work Laptop or iPhone 12 work really well.
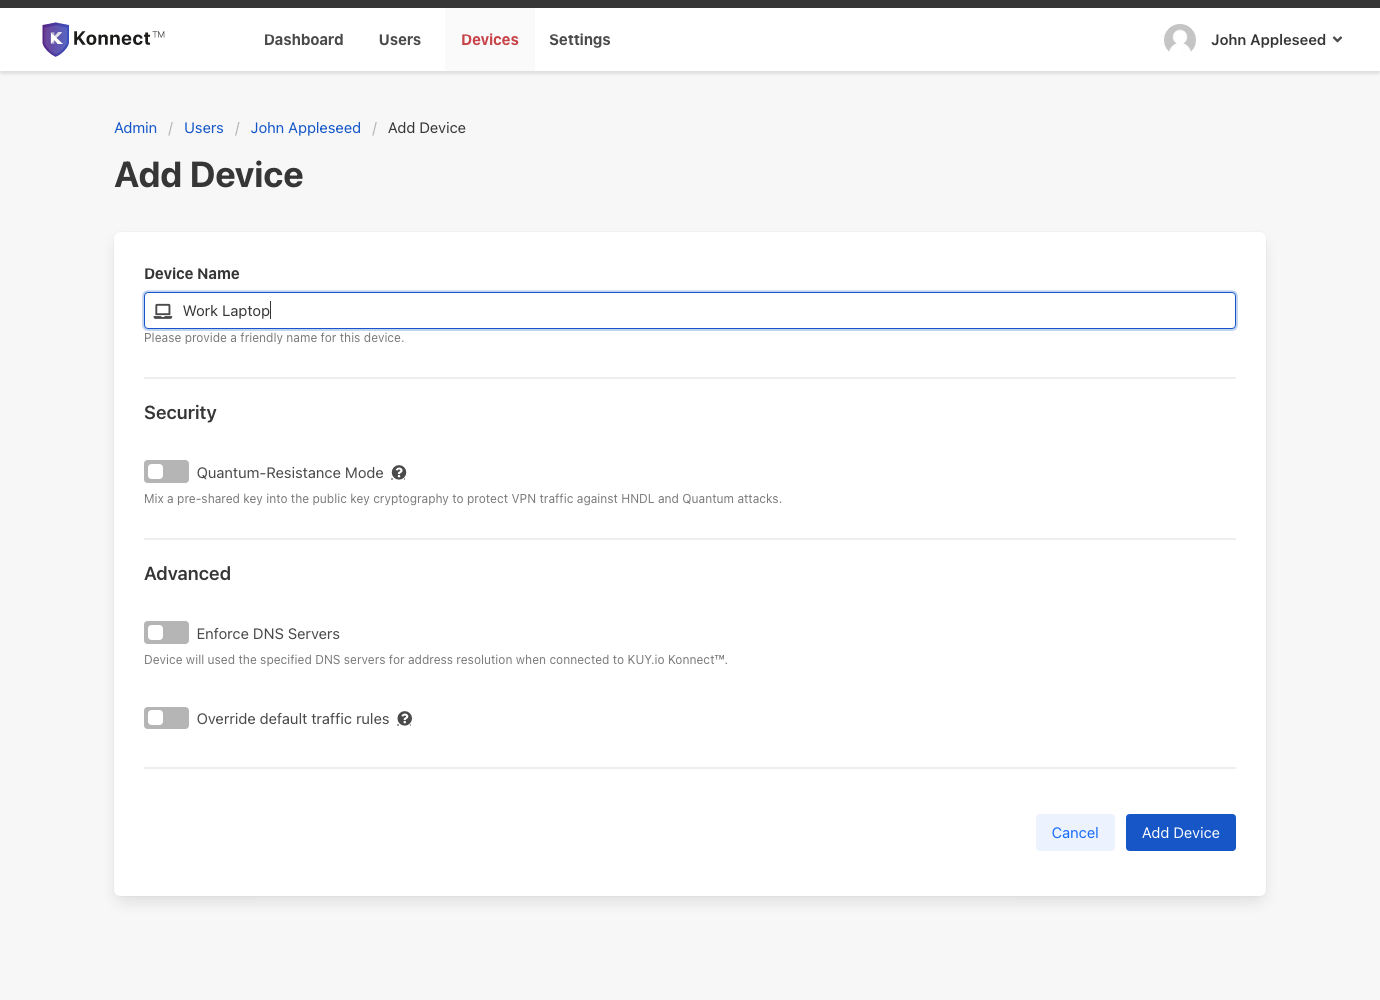
When you are done, click Add Device and the new device will be listed for this user. Your Konnect™ server automatically maintains the network space, generates client configuration files, all the necessary cryptographic keys, server-peer associations and takes on all other time-consuming setup steps you would have to take care of by hand if you were to set up a VPN by hand.
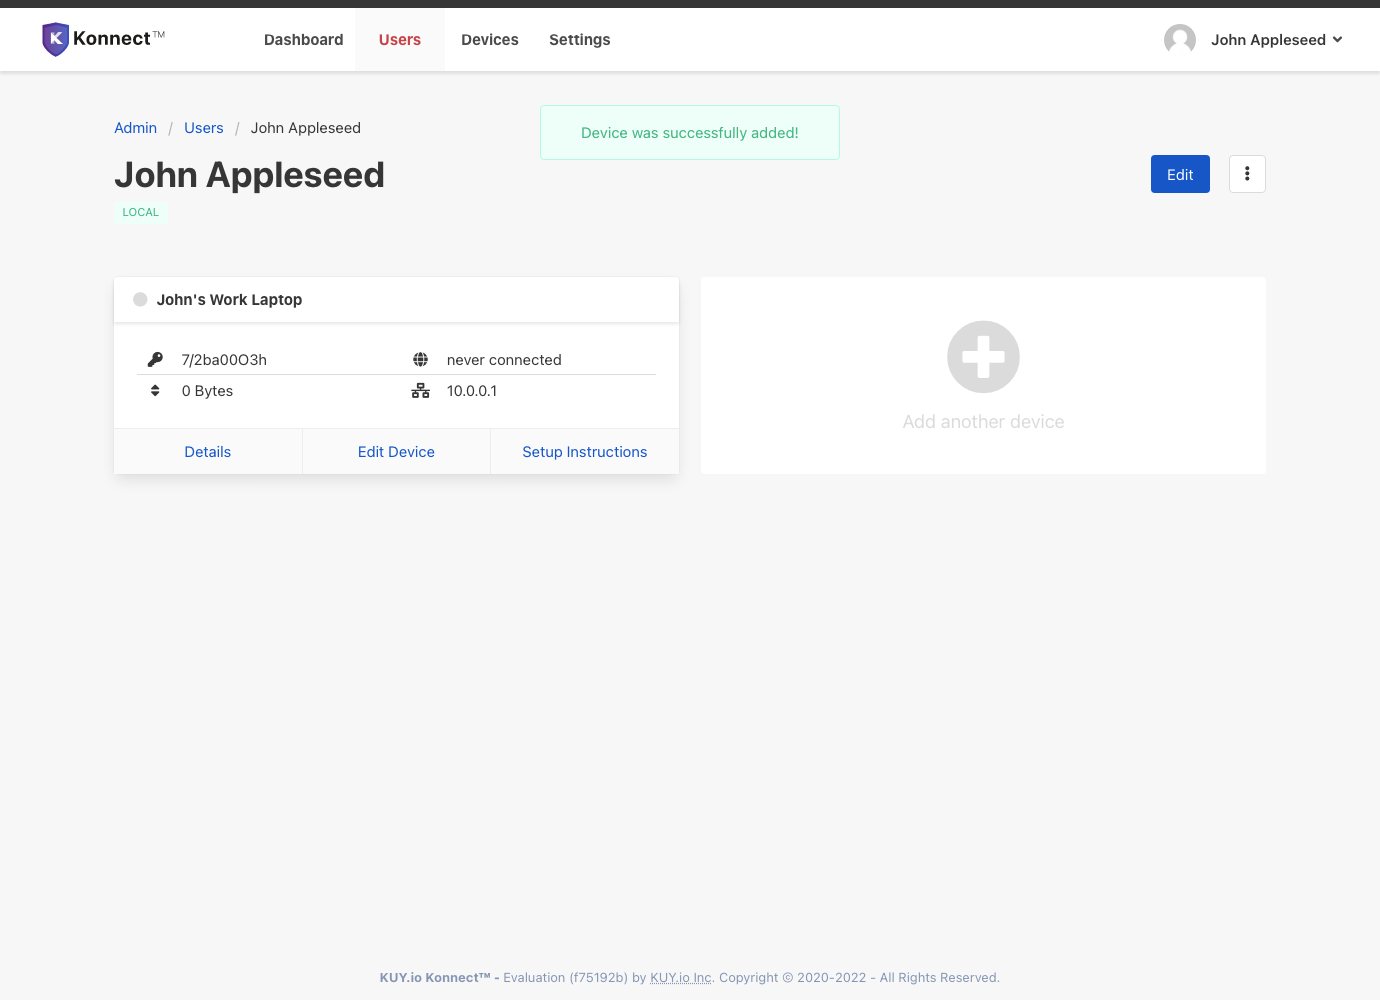
Finally, click on Setup Instructions on the device screen. You will be taken to a personalized setup instructions page that walks you through the steps required to configure and connect the device for all major platforms (Windows, macOS, iOS, Android).
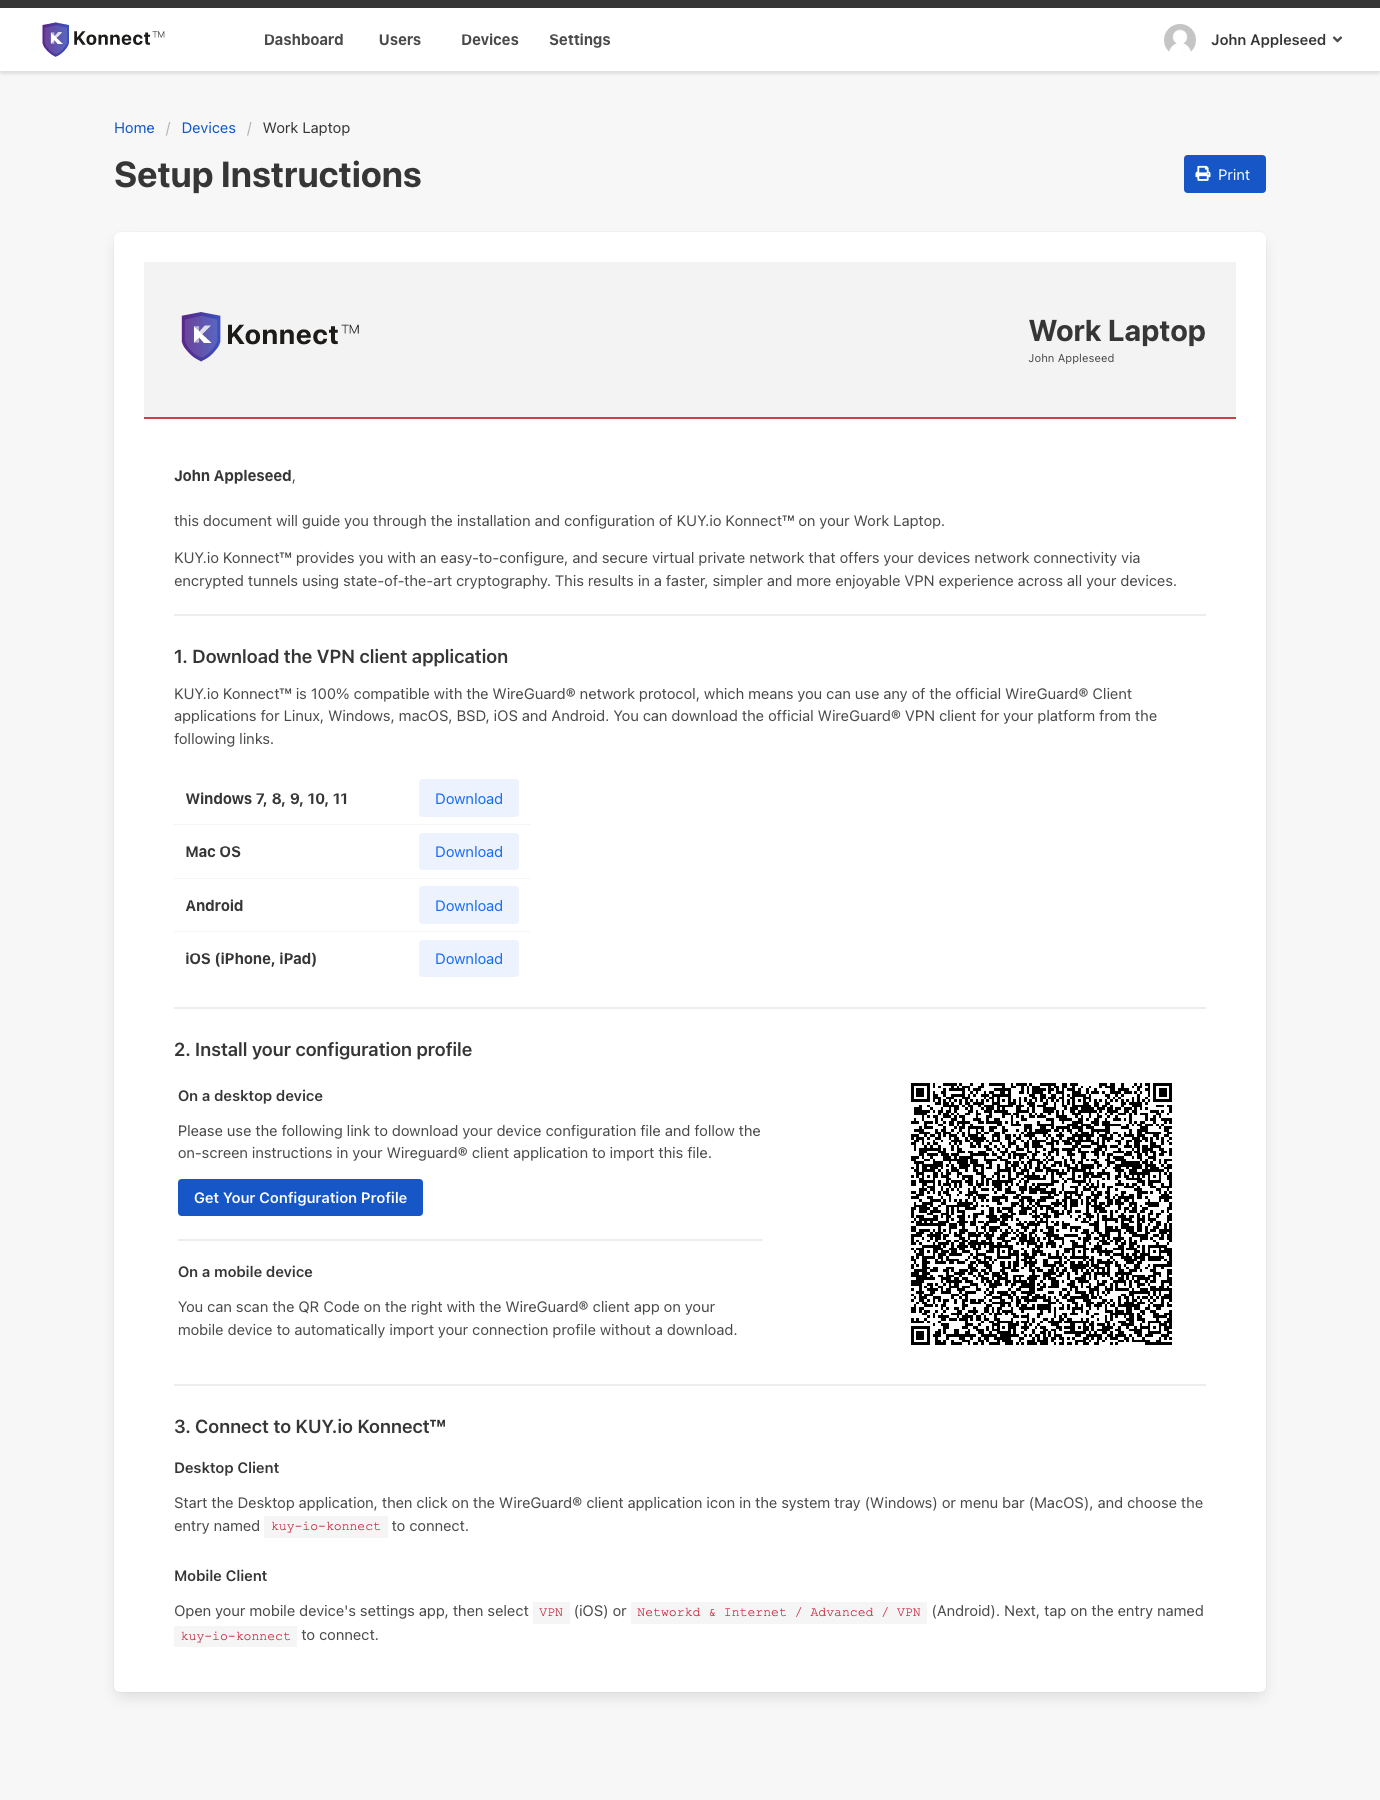
After following the instructions, start your VPN connection, and you can see the connected device listed as an active device on the admin portal dashboard. Konnect™ server automatically tracks consumption metrics, connection details, and other information for you, so you have all the data you need to confidently manage your virtual private network.
To learn more about each individual step and the many setup and configuration options available in Konnect™ server, select one of the topics in this documentation. If you get stuck, we are here to help.